credentials_gitlab
Table of Contents
1 GitLab Setup
1.1 Clone the Tutorial Repository on GitLab
To follow this tutorial, you need an account on GitLab. You then need to fork the repository for the code used in this tutorial on your GitHub account. To do so:
- Go to the repository for the tutorial: https://gitlab.com/luet/jenkins_tutorial
- and click
Fork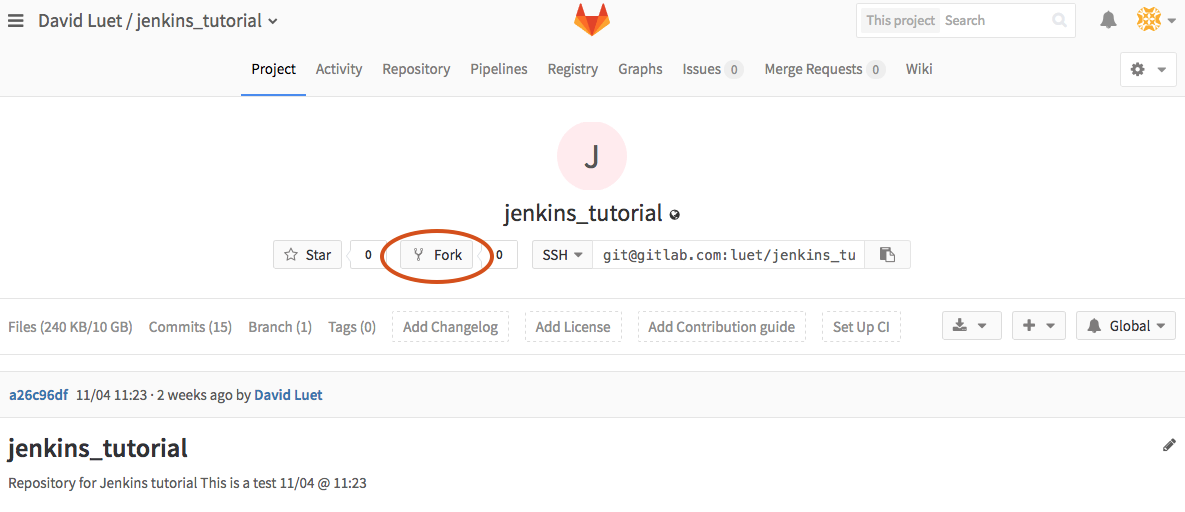
- This will create a repository on https://gitlab.com/GitLabID/jenkins_tutorial, where you should replace
GitLabIDby your GitLab ID.
1.2 Add buildbot-princeton as a collaborator
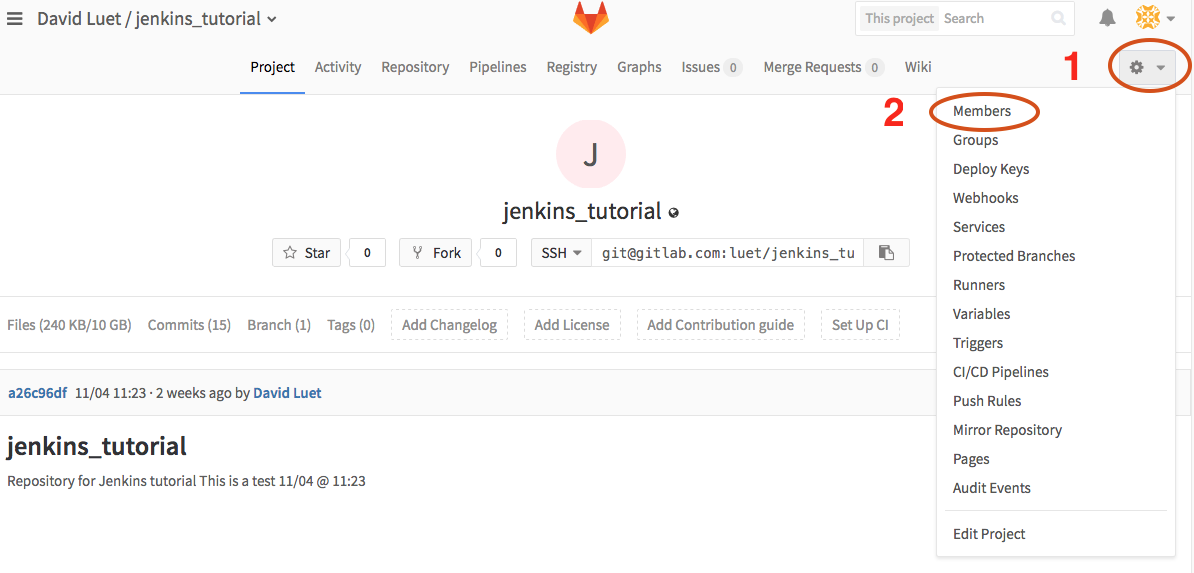
You need to add the GitLab user "buildbot-princeton", which is the GitLab id for Jenkins at Princeton, as a collaborator to your fork. Go on the settings (gear symbol in the top right) and select Members.
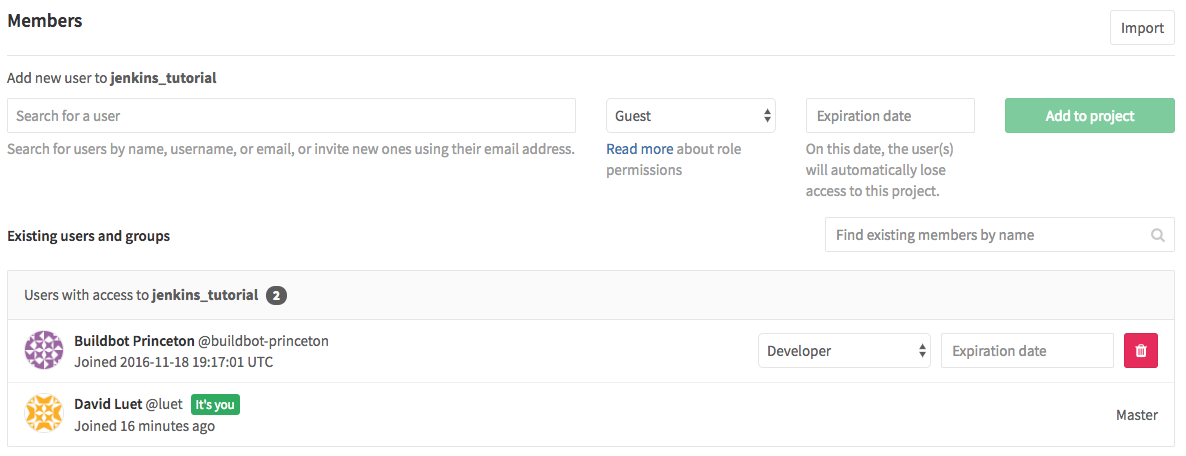
You need to give buildbot-princeton Developers permission.
Your Collaborators and page on GitHub should look like this:
1.3 Generate the ssh public and private keys
Now we are going to give the Jenkins server access to this GitLab repository using an ssh public/private key pair.
- Create a ssh public/private key pair on any machine that you have access to.
On a Linux or Mac machine you can generate those keys with the following
command:
$ ssh-keygen -t rsa -b 4096 -f id_rsa_gitlab -C "punetid@jenkins"
where you should replace
punetidwith your Princeton University netid. The command line options are:-fspecifies the name for the ssh keys, you should pick something meaningful to you.-Coption is a comment so you can use what you want.
You will be asked for a passphrase. You will need this passphrase when you copy the key to the Jenkins server.
- This command creates two files:
- the private key:
id_rsa_gitlab - the public key:
id_rsa_gitlab.pub
The private key will be copied on the Jenkins server and the public key will be copied on your GitLab account.
- the private key:
For more help on generating ssh keys, check the GitLab documentation.
1.4 Copy the public key to your GitLab account
Here is a summary:
- Connect to your GitLab account.
- Got to your repo (https://gitlab.com/GitLabbID/jenkins_tutorial).
- Click on the settings button (
 ) then
 Deploy keys(See the figure). - Copy the public part (
id_rsa_gitlab.pub) of your key. This should look like:ssh-rsa AAAAB3NzaC1yc2EAAAADAQABAAACAQDIHq5rydARXBMJeUO2ChE//D0p5nWNbBJugCvUmt3Bljf04AkePFiMskGpbn0kZdFkgDhDzjG6ICUGPc6HK-E4jnMrqRPLH6i6ukr3nZ2eV/VNKh6+F2x1u7zbFQQnroDVZ4f8/6LrKo39sY7BpYJZfy+Tk1q+G3EcpC1x8d3SjDQKeyptvdFTxe4BzlkRNVyMplU2hMXtp0/ti1FMSdBw/zTEqgpzjV+UW2QGwJsR9AUMEVKaebb22GVF/0Q90C38qtwRGR6z7Tib8GU78UYpYvuMDlZtLfmVRCIH48mMLon3z0KkbpBmtt9ZIJemYdHj9ldO0o7JscFhn/fhoViDAbRQ3puLCVzBD2Ke6FO9qgHTDPFLAplefAOFc36rCRuRQWlmgf7yvMlTuqmA5sZQCGn//P+NNS23fZya+0kMY3CVGmXNAFoIj5AkxuHG9JuU7P5aNNGtYmqGODkwudcCPbIANLGydn+0sNA+CfyGTEpbD/yTMlAKpCba8kut6Wqz2SjKlWfJW6TCgWRQrYYG2aeOmt4/LFJEf7COF463xbgAv/KCnza61bkIEg7YmeAvV6zvbyxCm6fwdwRkVGiuVEqSYqo+oqqQ+gL+RtxOK89opvpRL5Z/p2m/KJg36WkigmN0H70G2DwD6q0l/S+H9GjJCASkRj7n5vM3U8/qKQ== luet@jenkins
- and paste on your GitLab repository. This should look like this figure.
- Click
Add Key.
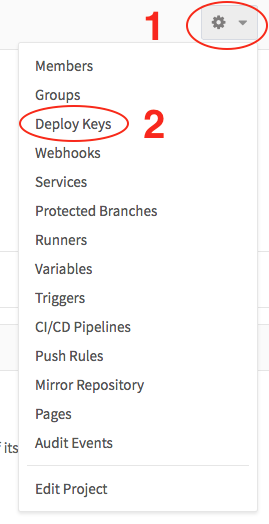
Figure 3: Menu for setting a deploy ssh key
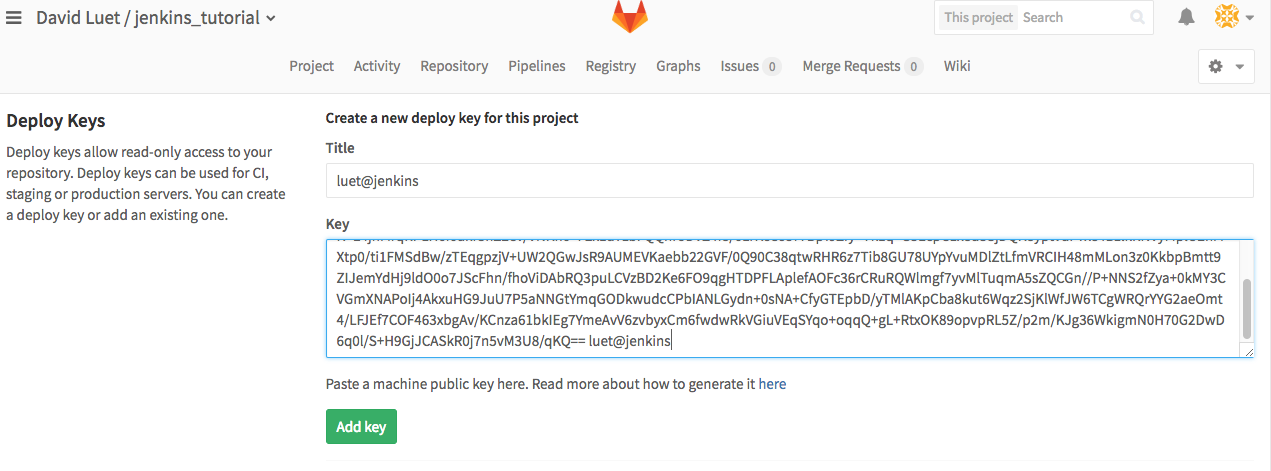
Figure 4: Adding GitLab deploy key.
1.5 Copy the private key on your Jenkins account
Now we need to copy the private part of the key to your Jenkins account.
- Connect to https://jenkins.princeton.edu with your Princeton University netid/password.
You will see the list of folders assigned to you, in this case there is one
folder called
tutorial_folder, in your case it will be the folder given to you by the Jenkins administrator.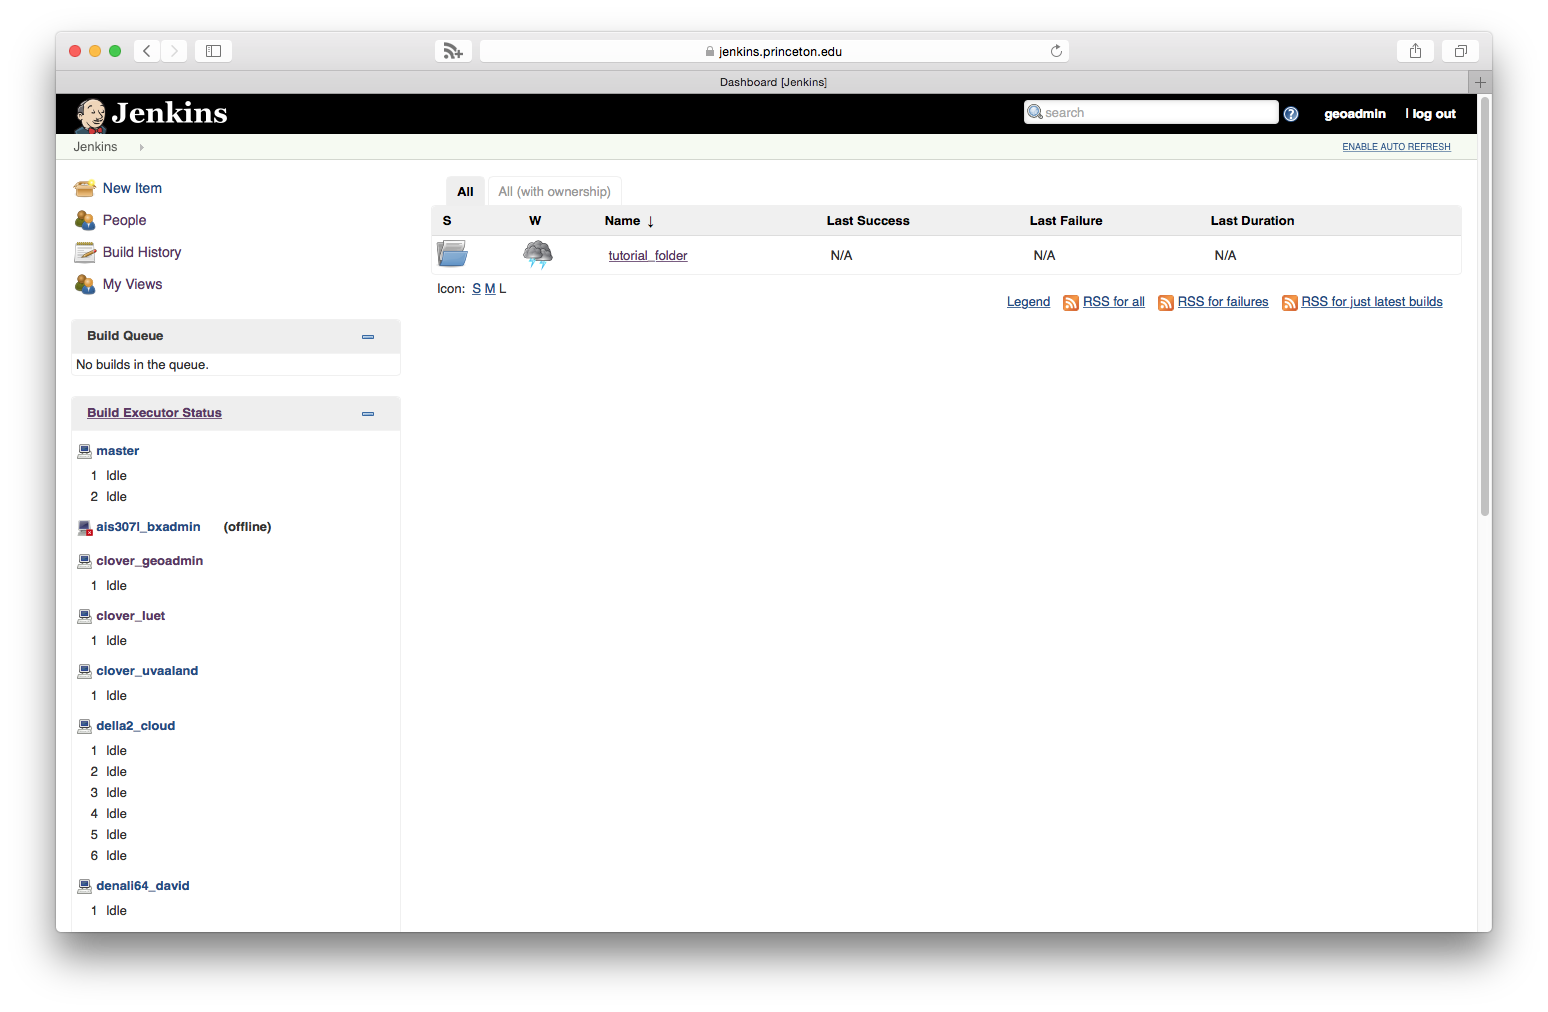
- Click on the folder
tutorial_folder - Click on
Credentials, thenFolderon the left-hand sidebar.
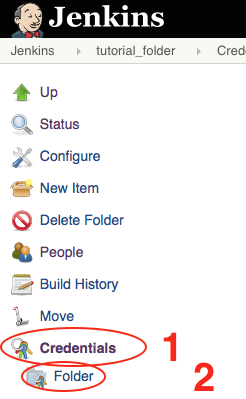
- Click on
Global credentials (unrestricted)
- Click on
Add Credentials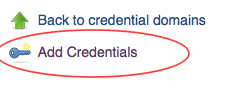
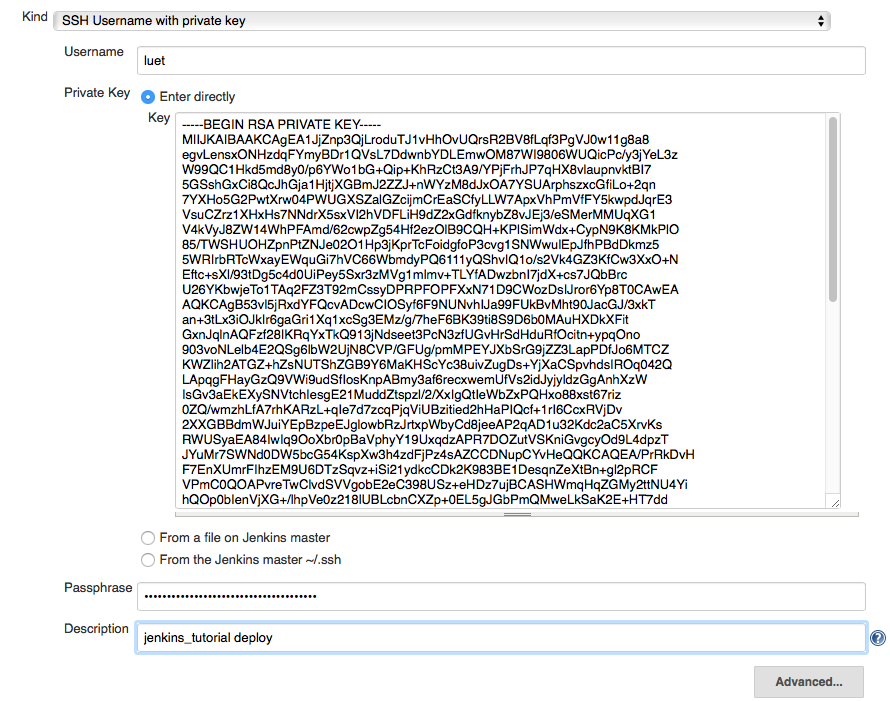
- Select:
- Kind:
SSH Username with private key - Username: your username on GitLab.
- Private key:
Enter directly. And copy paste the content of the private key fileid_rsa_github. - Passphrase: Enter the passphrase that you used when generating the ssh key in 1.3.
- Description: enter something that will make it easy to select the right
credentials later. I use
jenkins_tutorial deploy.
The page should look like this:
- Click
Ok.
- Kind:
2 Slave Node Configuration
Now we are going to give Jenkins access to the slave node.
The name of the slave node is slave.
The Jenkins system administrator will send you a file containing an
ssh public key named id_rsa_slave_punetid.pub that you need to copy on your
account on slave.
You can do it with the following steps:
- copy the ssh public key on
slave$ scp id_rsa_slave_punetid.pub punetid@slave.princeton.edu:~/.
- connect onto the slave host
$ ssh punetid@slave.princeton.edu
- make sure the directory
~/.sshexists and that the permissions are correct:[punetid@slave] $ mkdir -p ~/.ssh [punetid@slave] $ chmod 700 ~/.ssh
- Append the public key to the file
~/.ssh/authorized_keysand make sure the permissions are correct:[punetid@slave] $ cat id_rsa_slave_punetid.pub >> ~/.ssh/authorized_keys [punetid@slave] $ chmod 600 ~/.ssh/authorized_keys
- Create a directory called
jenkinsin your home directory[punetid@slave] $ mkdir ~/jenkins