
Now that we have set up all the necessary permissions between GitHub, Jenkins and the slave node, we are ready to configure some tests for the simple factorial code that is in your fork of the PrincetonUniversity/jenkinstutorial repository.
When you save your configure, you will see a note pop-up like this one:

This is because the Jenkins configuration is saved in a Git repository itself. This way if you ever make a mistake in your configuration, and you cannot remember what you changed, you can ask the Jenkins administrator to revert to a previous configuration. In the pop-up menu, you can either enter a comment for this commit or leave it blank. Then click on Submit comment.
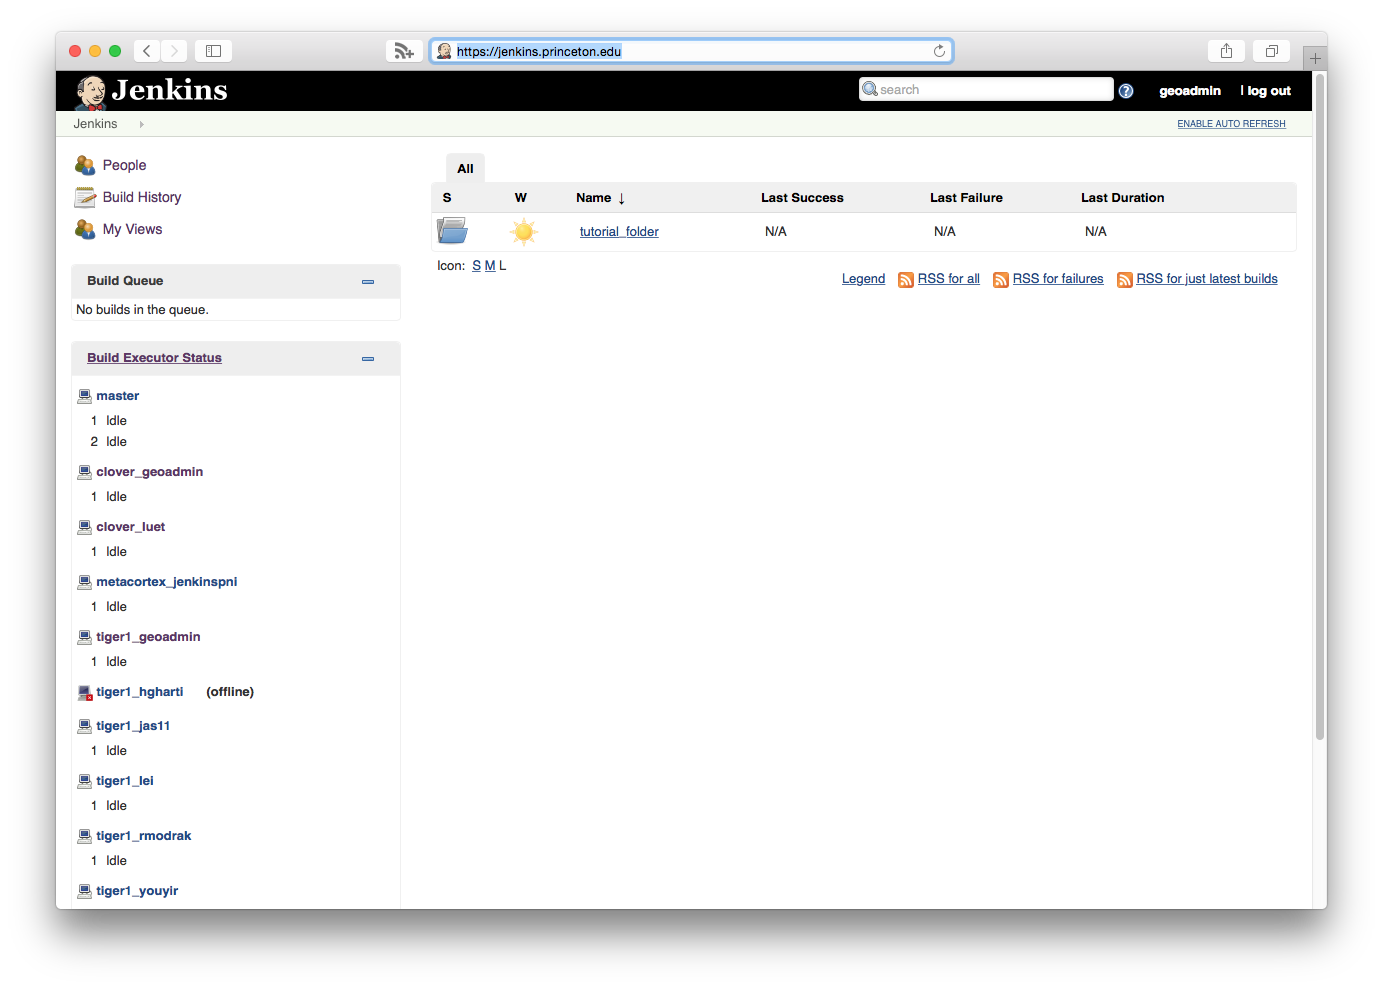
You should see the folder that was assigned to you. On the figure below, it's tutorial_folder
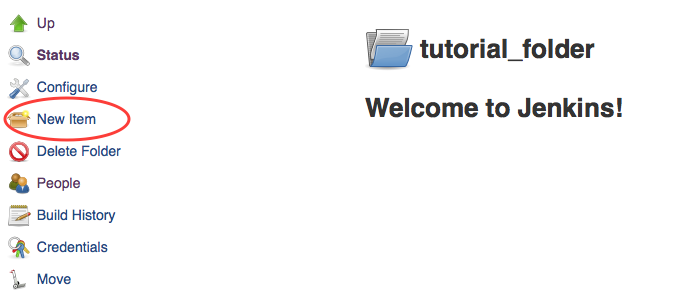
Click on New Item
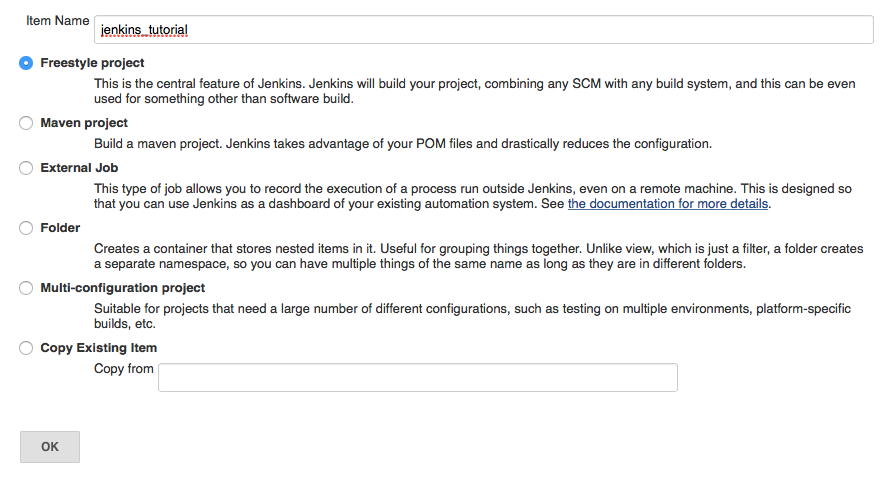
Create a new Freestyle project named jenkins_tutorial. Click OK.
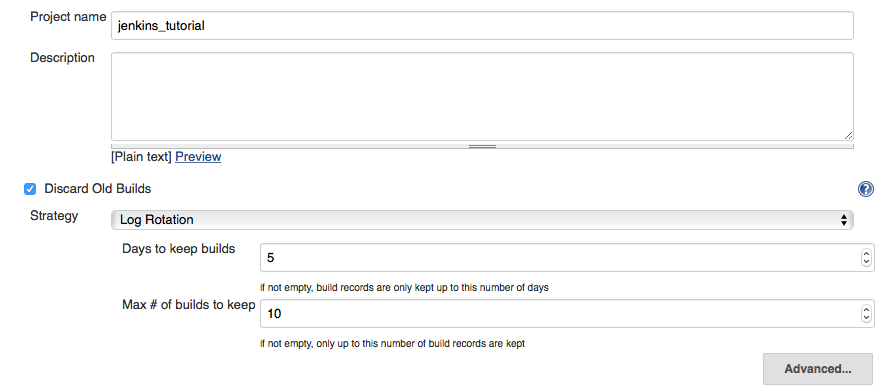
First, to save disk space on the Jenkins server, we will only keep the build logs for 5 days with a maximum of 10 builds. You can change this to something that makes more sense to you.
Discard Old Builds:
Days to keep builds to 5.Set Max # of builds to keep to 10.
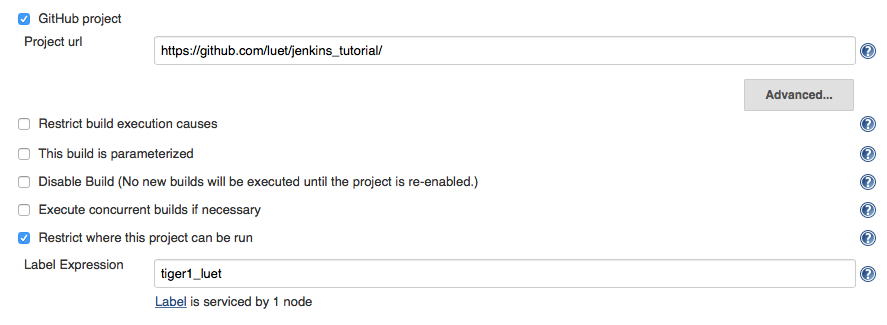
Check the box GitHub project. In the Project url box enter the url for your project. On the figure it is:
https://github.com/luet/jenkins_tutorial
because my GitHub login is luet.
Check the box Restrict where this project can be run. In the Label Expression box enter the name of the slave that the Jenkins administrator gave you. In our case, tiger1_luet because the slave node name is tiger1 and my Princeton netid is luet.
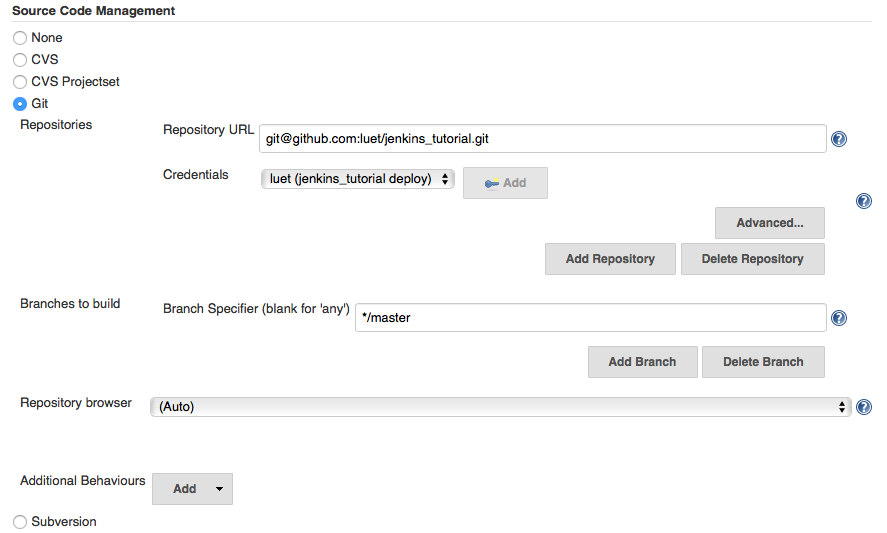
Source Code Management select Git.In the Repository URL enter
git@github.com:GitHubLogin/jenkins_tutorial.git
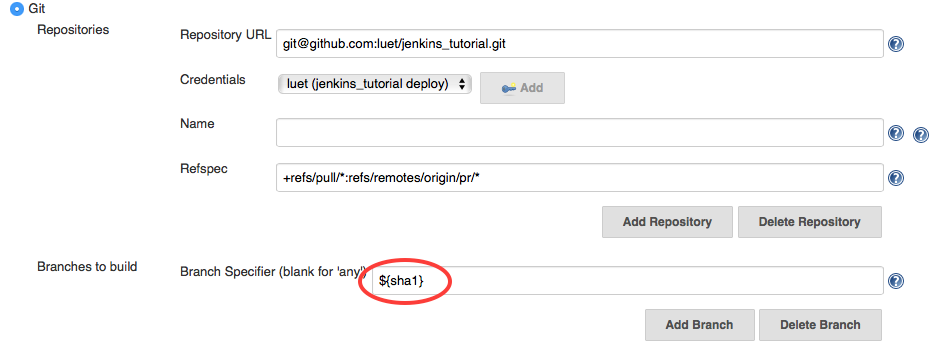
GitHubLogin with your GitHub login, which is luet in my case.Credentials box select the Credential you entered in Section jenkins_creds_for_GitHub. It appears as luet (jenkins_tutorial deploy) in the screen snapshot below.In Branches to build, leave */master for now.
At this point you have enough to test whether the repository can be cloned on the slave. To do so, click the Build Now button on the upper left hand side toolbar.

You should see a build starting in the left-hand sidebar:
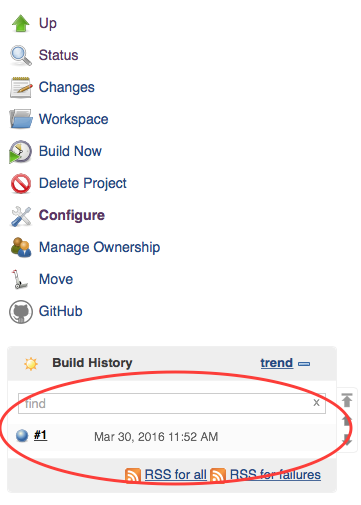
The build should run for a while and when it stops, it should have a blue ball on the left of the number. You can also ssh onto the slave node directly and you should see that the jenkinstutorial repository was cloned in the directory jenkins in your home directory.
We will now add a test. We don't specfify any Build Triggers for now, we will be testing by triggering a build manually with the BuildNow button.
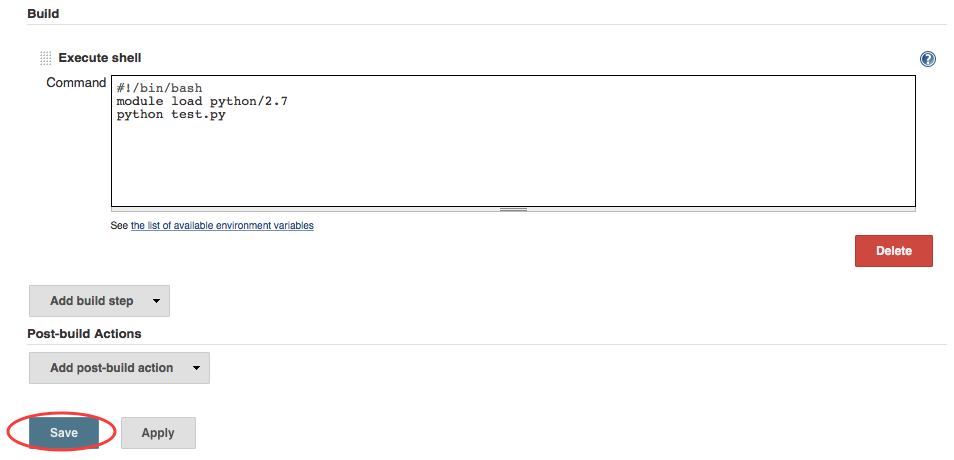
Go to Build and click Add build step and select Execute shell

With the Execute shell you are basically given a shell on the slave. The current directory for this shell is $HOME/jenkins/folder_name/job_name.
In the Execute shell box we enter bash commands to run the test that comes with the git repository in the tests directory. Note that there is no space between #! and /bin/bash, Jenkins will fail if there is a space.
#!/bin/bash
module load anaconda3
python test.py
Here we are running a Python unit test. This test uses the Python module unittest.
Then click Save to save this step.
Build Now at the top of the left=hand sidebar.After the run is done, the build history should show your test with a blue ball next to it
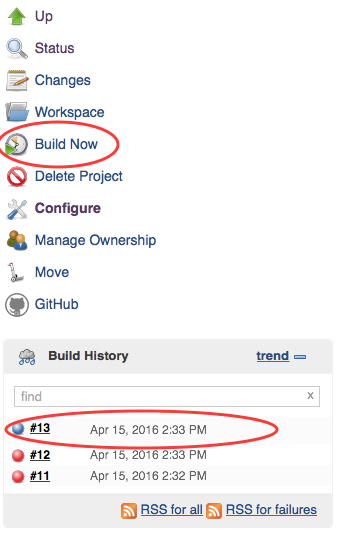
On the figure above the last build is #13. Click on the build number to get more details about the build.
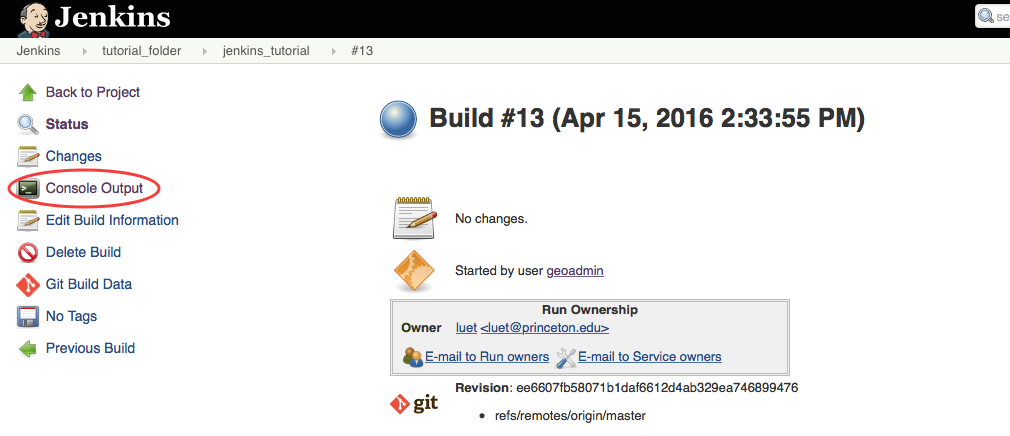
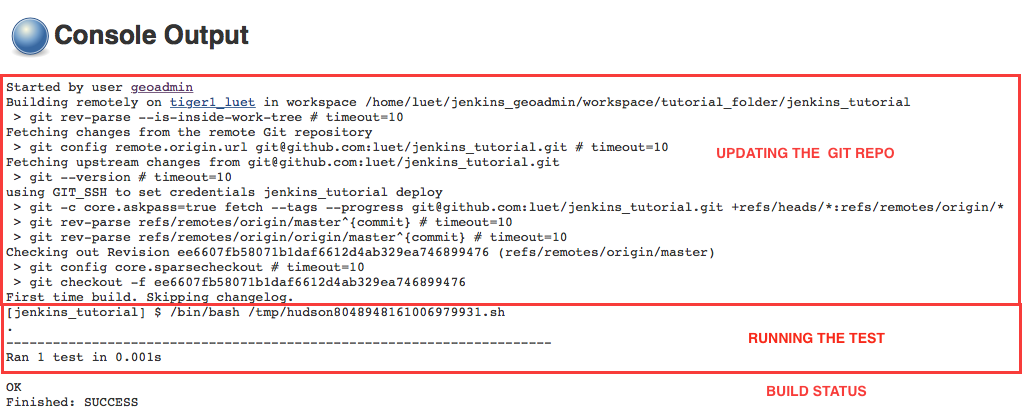
Console Output to standard output of your run. The build consists in two steps:
In that case the status of the test is Finished: SUCCESS.
Now we will have Jenkins send you an e-mail each time a build is run.
Go to the bottom of the page, in the section Post-build Actions.

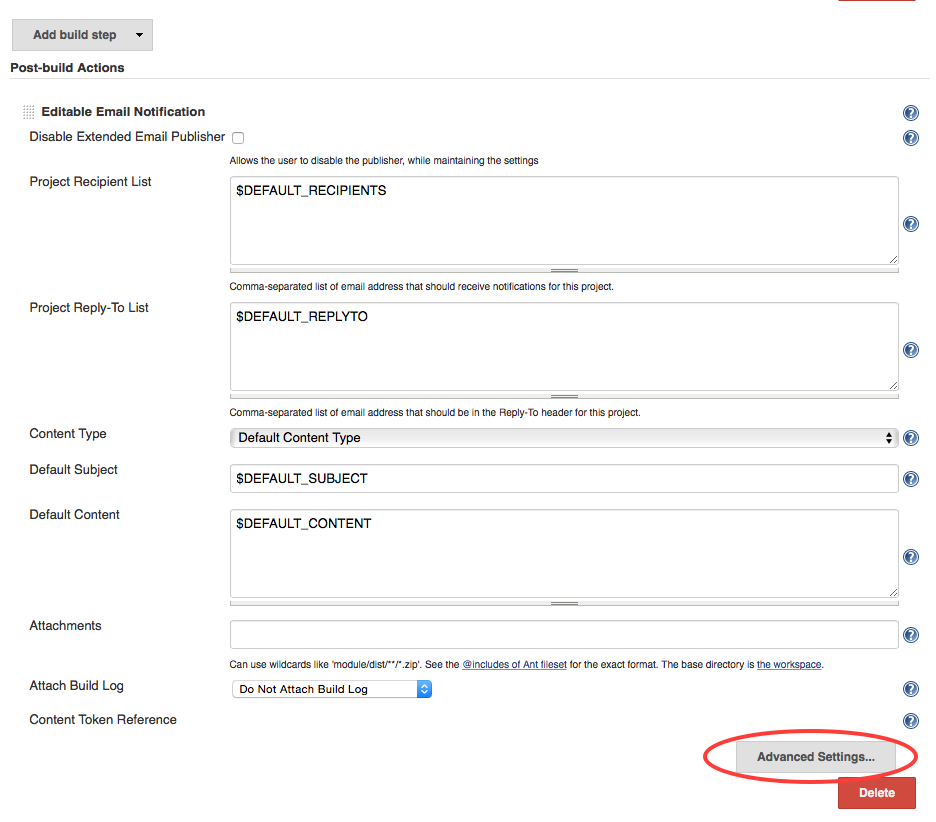
Click on the Add post-build action button and select Editable Email Notification. There is another choice, E-mail Notification, but it is less configurable than Editable Email Notification.
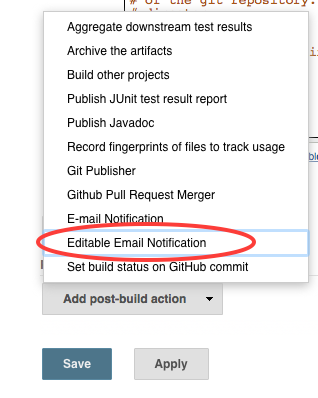
Editable Email Notification box:
In the Project Recipient List, delete $DEFAULT_RECIPIENTS and enter your e-mail address instead

If you leave the $DEFAULT_RECIPIENTS, Jenkins will look through the logs of the git repository and find the e-mails of all the developers.
Select Advanced Settings...
In the Triggers box, remove the default trigger, by clicking Remove Trigger

The Failure - Any trigger sends an e-mail only in case the tests fails. In this tutorial, we want to receive an e-mail even in case of the tests were successful.
Add Trigger and Always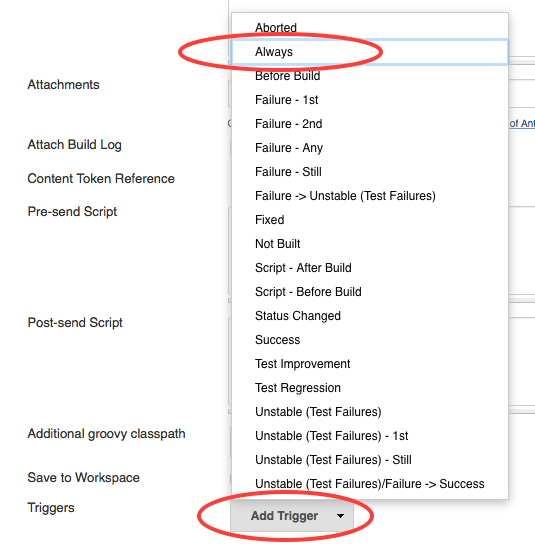
Click Delete under Developers,

Save at the bottom of the page.Click Build Now to run a build and you should receive an e-mail.
Using the Build Now button is useful for testing, but in production mode you want the tests to be run automatically.
We will now add a build trigger that will start a build automatically when someone opens a Pull-request toward your clone on GitHub. A great advantage of testing on a pull-request is that the changes are tested before they are committed to the git repository.
In the Configure menu:
Go to the Source Code Management and click the Advanced button

In the Refspec box enter: +refs/pull/*:refs/remotes/origin/pr/*. It is a regular expression that tells Jenkins to fetch the pull-requests from GitHub.

In the Branches to build section, box Branch Specifier, replace */master with ${sha1}. This tells Jenkins to use the variable sha1 that is sent to Jenkins by GitHub. The variable sha1 will contain the SHA1 tag of the git commit to pull. Note that at that point you cannot use the Build Now button anymore.
Build Triggers section:
GitHub Pull Request BuilderAdmin listUse github hooks for build triggering
Click Save at the bottom of the page.
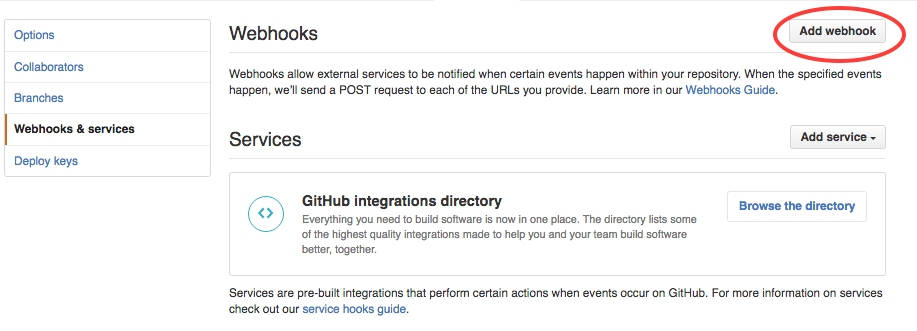
You need to add a Webhook to your GitHub account. A Webhook is a mechanism for GitHub to send a message to the Jenkins server when a Pull-Request has been opened.
Go to your fork on GitHub and select Settings
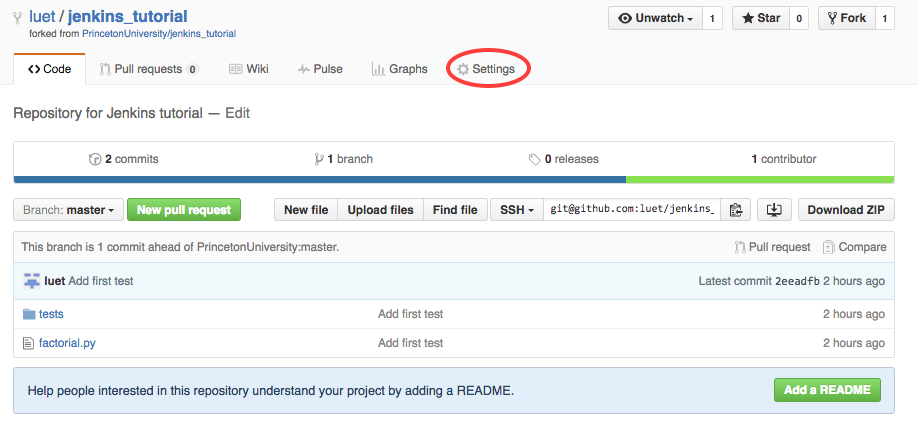
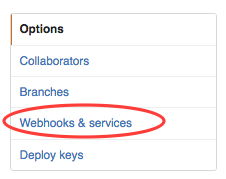
Select Webhooks & services
Select Add webhook
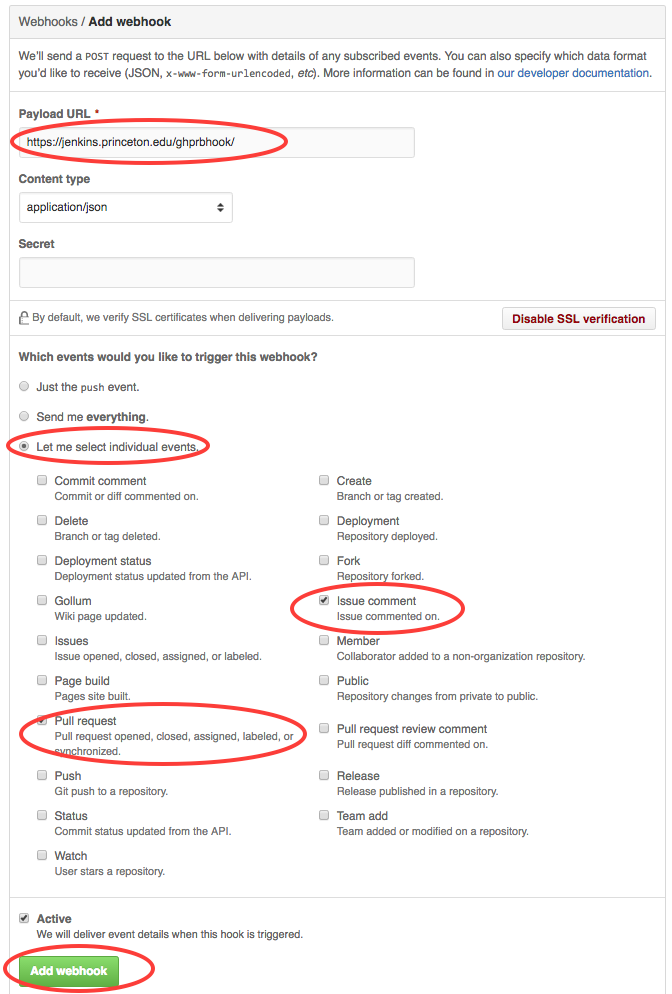
In the box Payload URL enter
https://jenkins.princeton.edu/ghprbhook/
Content type box, select application/jsonWhich events would you like to trigger this webhook?, select:
Let me select individual events and pick
Pull requestIssue commentClick Add webhook at the bottom of the page.
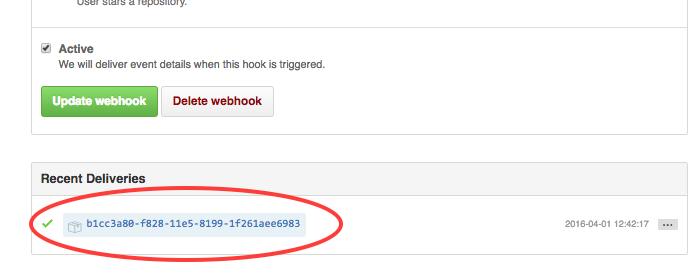
GitHub will send a test message when you first create the webhook. At the bottom of the webhook page you should see something like the figure below. Note the green check mark to the left.
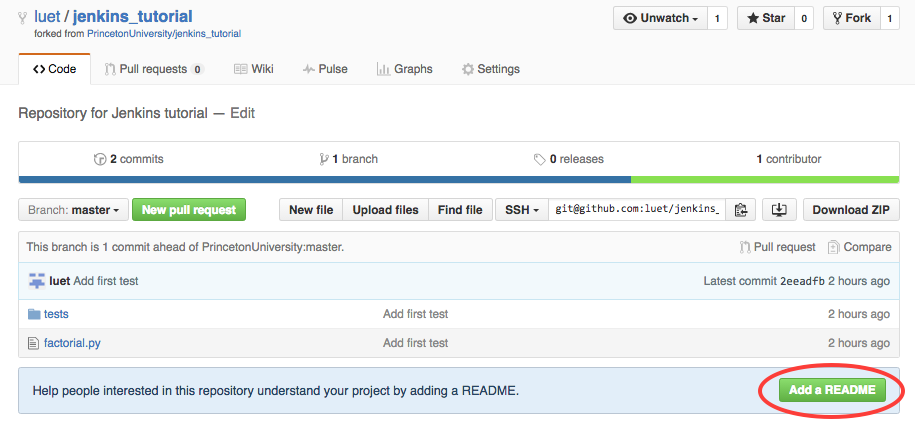
Now we will make a change to the code and open a Pull-request to merge the changes. We will do it directly on the GitHub web site but you could do everything on the command line if you are familiar with git. We will simply add a README file to the repository.
Go back to the code on GitHub and click on Add a README
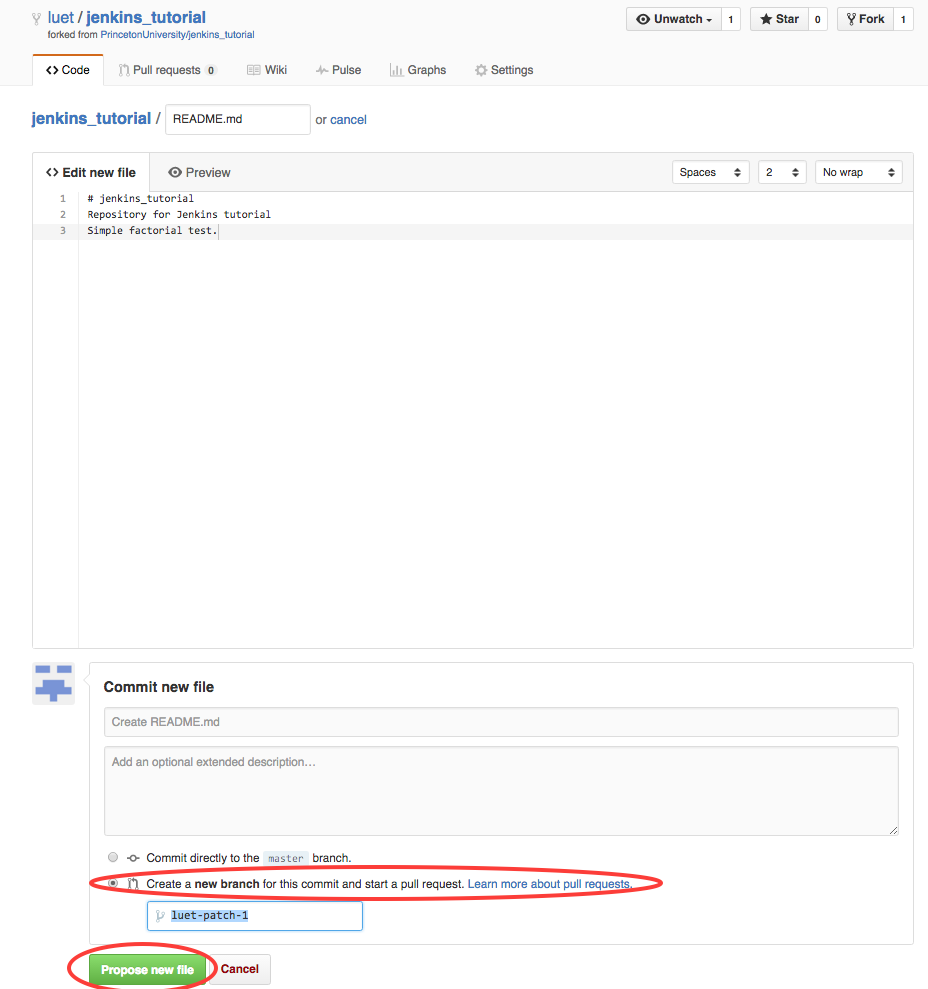
Add something to the README.md and select Create a new branch for this commit and start a pull request, then click Propose new file
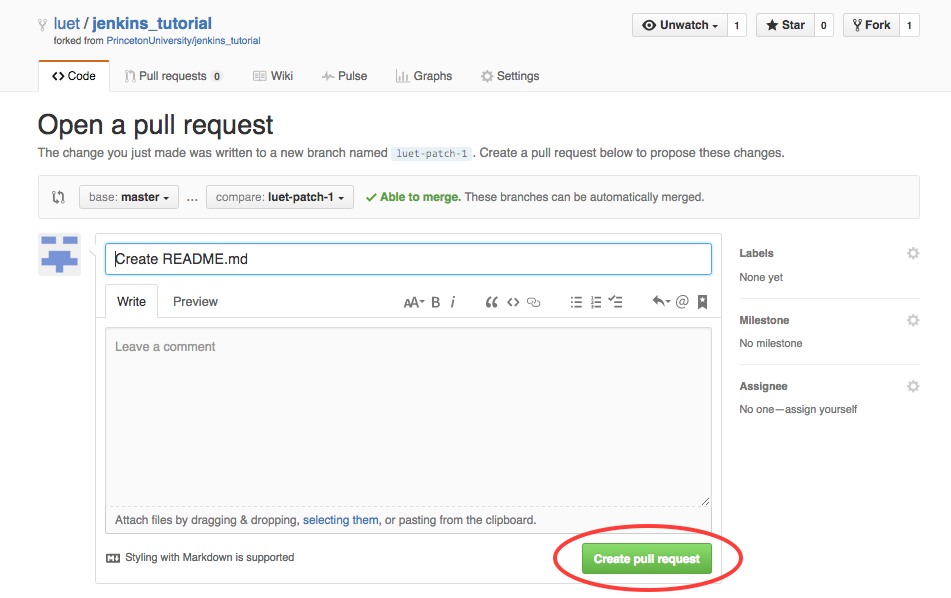
In the new window click, Create pull request
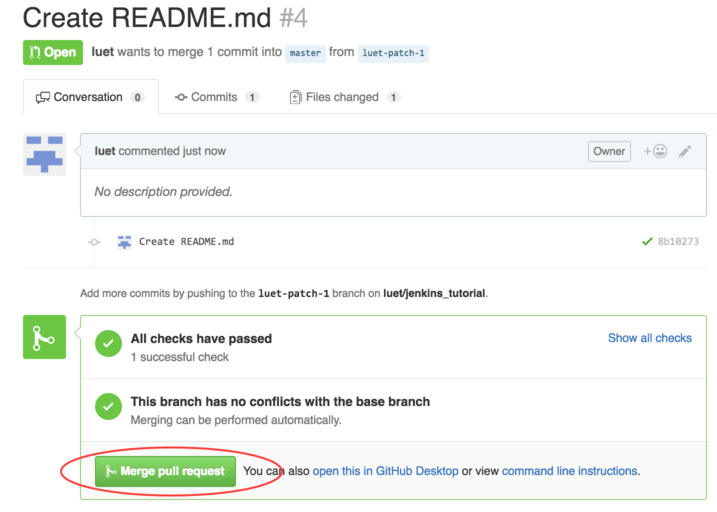
If all the tests passed successfully, you can click Merge pull request to merge the Pull-Request.